Showing posts with label DIY crafts. Show all posts

Monday, 30 September 2013

Creating handmade gifts...... for men!

Hello all,

Welcome to the first DIY inspired gift guide....  This one is for those men folk in our lives!  I've scoured the web and pinterest for a variety of gift ideas and whilst I have not tried them and can't vouch for how easy the instructions are to follow, I know there are a  lot of crafty folk out there who can rise to the challenge and create fabulous handmade gifts. 

This is by no means an exhaustive list, just a selection of the many tutorials out there.  Happy crafting!


by Brett & Kate McKay of the Art of Manliness blog


 Chef's Apron

by Martha Stewart


Suede Ipod Case

by Martha Stewart


Leather Journal

by MUFN inc blog


BBQ Hanging Towels

by The Silly Pearl blog


Golf Club Head Covers
 
by Positively Splendid


Grill Rubs

by Kojo Designs


Hand Printed Mouse Mat

guest post on the Design Sponge by Man Made DIY


Monogram Mugs

by Design Mom


Handmade Tie

by the Purl Bee


Comic Book Coasters

by Mod Podge Rocks


Boy's Wallet

by Noodle Head


Bicycle Brake Clock

by the Instructables


Car Kit

by Holidash


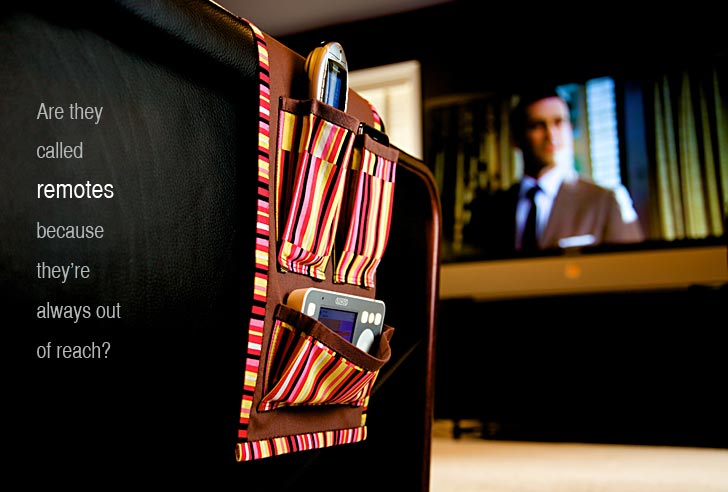
by Sew4Home


Well I hope that has given you some inspiration, I would love to see any creations you make, link to them in the comments.  And if you have any suggestions for the next DIY gift guide then please shout! 

Until next time...

Amanda xx


Tuesday, 24 September 2013

It's begining to look a lot like C.........

Afternoon all,

I have to say, my body is getting very confused by this changing weather, last week I had to put the heating on and now this week it's sunny and really warm!!  The cold turn last week and the flurry of Christmas posts on my Facebook feed prompted me to start thinking about Christmas (look away now if the thought of Christmas planning in September turns you cold!!)


Picture courtesy of vimeo.com


It's my aim this year to either buy handmade gifts or make them myself so you can see why I wanted to start early!  Last year I created some handmade gift guides and this year I want to do the same but with more of an emphasis on actually making the gifts as I know there are a lot of DIY crafty people out there.

I asked on my Facebook page who you would like to see a gift guide for in order to get some inspiration and the first (and only!) response was gifts for men, so watch this space....  Our first handmade gift guide for the festive season will be for those difficult to buy men. 

Just as a caveat - the tutorials I link to are not necessarily ones that I have tried, but part of my online searching and pinterest stalking!


Picture courtesy of Pixels and Company


Good luck crafting and if there are any other gift types that you would like inspiration on please leave a comment.

Until next time...
Amanda xx

Friday, 23 August 2013

A way to spend a Sunday... pick your own fruit and making jam!

Afternoon all,

I have been meaning to write this post for a week or so but had not gotten chance to take pictures of the final product!  A couple of weekends ago we went to Parkside Farm in Enfield to pick enough berries to make some jam, it's been perfect weather for it, sunny but not baking hot that our fruit went mushy on the way home!

Hubby picking fruit!

Views across the POY fields

Me forraging for the good ones!

Such a lovely day


I had originally wanted to make raspberry jam as their website said they had a plentiful crop, however when we got there they also had blackberries, red currants and black currants, so we picked a mixture so that we could make Summer Fruit jam.

Here's how we did it...

Ingredients:

1kg of fruit
Juice of 1 lemon
1kg of jam sugar

Method:

  1. Put a small plate in the freezer (this is for testing your jam)
  2. Sterilize your jars by putting them through the hot cycle in your dishwasher (no detergent)
  3. Tip half the fruit and the lemon juice into a pan and mush up using a potato masher, once mashed heat on a medium heat for 5 minutes
  4. Pour mashed fruit through a seive so all the juice and pulp goes through, leaving you with a seed mixture
  5. Add the pulp/juice back to the pan and combine with the sugar
  6. Once combined heat gently and add the remaining fruit and bring to the boil.  Allow to boil for 5 minutes 
  7. Drop a teaspoon amount onto the chilled plate and if it wrinkles and feels like jam consistency then it's ready.  If you like your thicker, return to the heat and boil for a few minutes longer.
And this is the finished result.......

Homemade mixed summer berry jam


It sure tastes yummy!!

To make the labels I used a free designer called Jam Labelizer, there are a handful of different designs you can choose from.

We've also made red currant jelly and chilli jam so I will blog about those another day.

Until next time...

Amanda xx


Friday, 9 November 2012

Mexican Hot Chocolate...... yummy!!

As the nights (and days) are getting colder I realised it was that time of year again to make a big batch of Mexican hot chocolate.  After making it, I thought I should share it with you all as it truly does warm you up....

As I don't have a food processor of my own I asked my lovely Mum if I could borrow hers as grating chocolate by hand takes a loooooong time!  So I've made her a little jar of it as a thank you (will be giving it to her tomorrow).


So here's the recipe for making 2 yummy cups of hot chocolate:

Ingredients
  • 2 cups of milk
  • 1 tbsp brown sugar
  • 125g of dark chocolate (or a mix of dark and milk like I did) - finely chopped or grated
  • 1/2 tsp vanilla essence
  • 1/8 tsp cinnamon
  • Pinch of cayenne pepper
Method
  • Heat the milk and sugar, when sugar has dissolved, turn off the heat
  • Add in the chocolate, cinnamon and cayenne pepper until the chocolate has melted
  • Bring back up to a simmer for 3 minutes
  • Sieve mixture before pouring into pre-heated cups
  • Enjoy!

If you want to make a bulk batch for yourself or as presents then all you do is scale up the measurements of the chocolate, sugar and cinnamon and add to jars and decorate. 


Don't add the cayenne pepper until you make it as it gets lost in all of the ingredients and you don't get that kick.  Also, don't add the vanilla essence to the bulk mix as it just makes it wet.  So you can either buy these to go with your hot chocolate gift or leave it if you know that your recipient has a well stocked spice and baking cupboard! 

Finally, add the method for making to the jar and voila..... Yummy Mexican hot chocolate


Until next time...

Amanda xx

Wednesday, 29 August 2012

A crafty bank holiday

Hello all,

So I hope you all had a great bank holiday weekend, I am loving the fact that it's already half way through the week and that it's now nearly the weekend :) 

Our weekend was spent with old friends and started with a damp but fun BBQ (what did we expect?!  No one books a BBQ for bank hol weekend, it is destined to rain!!)  However, on Sunday I had a go at some new crafts with "K" whilst the boys played golf.  Here's what we tried:

Book binding

Using some very detailed (and a tad confusing at times) instructions from Pinterest we created a hand bound fabric covered notepad each using some very pretty fabric I picked up in the Liberty's off cuts bin (love that place!) and decorated the outside


I have to admint, not bad for a first attempt... look forward to making more!

Glass engraving

After seeing a post by a fellow blogger The Pea Pod on glass engraved tea light holders I just had to give it a go and after seeing her designs thought it would be great if I could make 40 for our wedding next year (hmmmm!)

So I purchased an engraver and attempted my first "simple" dandelion design.  NB - need to buy some safety specs!!  This is the result.....


I think need I need to practice first before I attempt the more complicated designs for the wedding.

But anyway, it was good fun and kick started me back into trying new crafts and look forward to whatever I try next.

What crafts have you tried or shall I try next?!  Answers below greatly appreciated!!

Until next time...

Amanda xx

Saturday, 18 August 2012

Cushion Covers

Hello All,

Hope you've all been enjoying the sunshine!  I took a break from over heating to do something I have been meaning to for AGES......  make new cushion covers.  So I decided while I was making them to photograph what I was doing and create a step by step guide.

This is to make a 56cm square envelope cushion cover with the front fabric being different to the back.....

What you need:

- 58cm x 58cm of front fabric (upholstry fabric was used)
- Two pieces of back fabric (thick cotton/poly blend was used) measuring 58cm x 41 cm
- Pins
- Tailors chalk or pencil
- Tape measure
- Matching thread
- Cushion pad
- Fabric scissors
- Sewing machine (or you can hand sew!)


Method:

1.  Be organised and get all of your bits together.

2.  Measure and mark out your fabric using a tape measure and tailors chalk.


 3.  Cut out your fabric using fabric scissors (best not to use scissors that have cut paper as these tend to be blunter and therefore don't give as clean a cut).


4. With the backing fabric, on the longest side you need to create a neat edge as this will be on show.  To do this, fold over 1cm of fabric and then fold it over again by 1cm, pin in place.


5.  Then head over to the sewing machine and stitch this hem in place. 


NB - I used a straight stitch and a chocolate brown thread to contrast against the blue.


6.  Time to construct the cushion cover.  Place one of the backing pieces on top of the front fabric, you want the sides that will be showing on the cushion at the end to be facing each other (this is known as right side together).


 7.  And pin together.


8.  Do the same for the second pieces of backing fabric

9.   You will now have an "inside out" cushion cover, so turn it back the right way and tada......


NB - should have maybe ironed the fabric first!!

You may have noticed in the first pic (and if you didn't how many of you scrolled back to the top!?) there were some buttons, the plan had been to finish the back off with buttons, but having a 10cm overlap for the "envelope" made me think it wasn't needed so I've come up with another use for them!

So there we have it, my finished cushion cover, only 6 more to make haha!


Happy crafting everyone!

Until next time...

Amanda xx

Tuesday, 3 April 2012

DIY Crafts - Flower Arranging

So it’s another “first” post, this time I’m doing a DIY craft feature where I hope to impart a newly acquired skill or give away a freebie download.  This time, I’m going to show you how to arrange flowers!

For Mother’s Day weekend; my sister (and fellow blogger – JewelOri), her other half (I’ll call him J) and myself set about making a flower arrangement to give to our Mum’s.  I was very surprised at how well they turned out, so much so that J’s Mum didn’t believe he had made it!!!  See for yourself…


So here’s how to do it.

What you will need:

-          Florist oasis (can be bought online or at most garden centres)
-          Knife (to cut the oasis )
-          Florist scissors
-          Greenery (can be taken from garden – in our case it was Mum’s garden!)
-          Flowers (we used supermarket flowers, each arrangement used one small bunch)
-          Sturdy flower put (i.e. not plastic)
-          3 Sticks for the trunk of the arrangement (we used twisted willow branches, again from Mum’s garden)
-          Bowl or sink of water

Step 1 – Cut your oasis

You will need two cubes, roughly 4 inches by 4 inches (10cm) with the edges and corners rounded.  It doesn’t have to be perfectly spherical.  Then place these into a bowl of water and let them sink.  Do not push them into the water otherwise you’ll get air bubbles.


Step 2 – Pick your greenery

You’ll want something leafy so that you can cover the bottom and fill out the flower ball on the top.  The end result is to have something that looks like a topiary bay leaf tree.


Step 3 – Assemble the trunk

Place one of the oasis balls into the flower pot and push the 3 sticks into the oasis so that it is firmly in place but not pushed all the way through to the other side of the oasis.  This creates the base and trunk of your arrangement.

Step 4 – Cut your greenery

Work with small sprigs of greenery at a time, two or 3 leaves on a stem.  Cut away any stray stems that look unsightly


Step 5 – Arrange your base greenery

Push the sprigs of greenery into the base oasis until you can no longer see the oasis.


Step 6 – Select your flowers

We decided to go for two colours within our arrangements, but you can use more colours or just one colour in yours, it is entirely up to you.  


Step 7 – Secure the top oasis

Carry your arrangement back over to the sink and whilst holding the trunk of the arrangement push the second oasis ball onto the top of the sticks.  Don’t worry about the water coming out of the oasis, this is normal – just make sure you have a towel to hand! 


Step 8 – Add the flowers

Now you can start adding the flowers to the ball.  You don’t need a huge stem on the flowers, about an inch (2.5cm) will do.  The aim is for the top to be spherical, so depending on how round your oasis is, you might have to push some flowers in more than others.


Step 9 – Keep adding

Keep adding flowers and greenery until you can no longer see the oasis ball beneath.  Don’t forget the underneath of the top ball, it is a good idea to stand back and look at your arrangement from all angles to make sure you don’t have any bald spots.


Step 10 – Stand back and admire!

And there you have it, a beautiful flower arrangement that costs under a tenner to produce, now all you have to do is decide who to give it to.


Until next time…

Amanda x